
Did you ever pack a small tool kit for your favorite scrapbooking class, only to discover you brought the wrong kind of adhesive? Ever buy a nice looking “all purpose” glue only to find that it didn’t really fit all of your purposes? Ever picked a cool embellishment out of your stash and wondered how in the world you were going to make that stick?
One of the most common questions we get in the store is, “Which adhesive do I need for this?” It can be a little intimidating staring at an 8 foot long display of tapes, liquid glue, glue tabs, glue dots, pop dots… and the list goes on. Do you really need all of those different things? The answer is yes and no. You don’t need one of every type of adhesive you’ve ever seen, but unless you have very little variety in your work, you are going to need a few different types of adhesive to meet all your paper crafting needs. We thought it might be useful to show you a basic scrapbooking layout and discuss a few adhesives that we believe every paper artist will need.
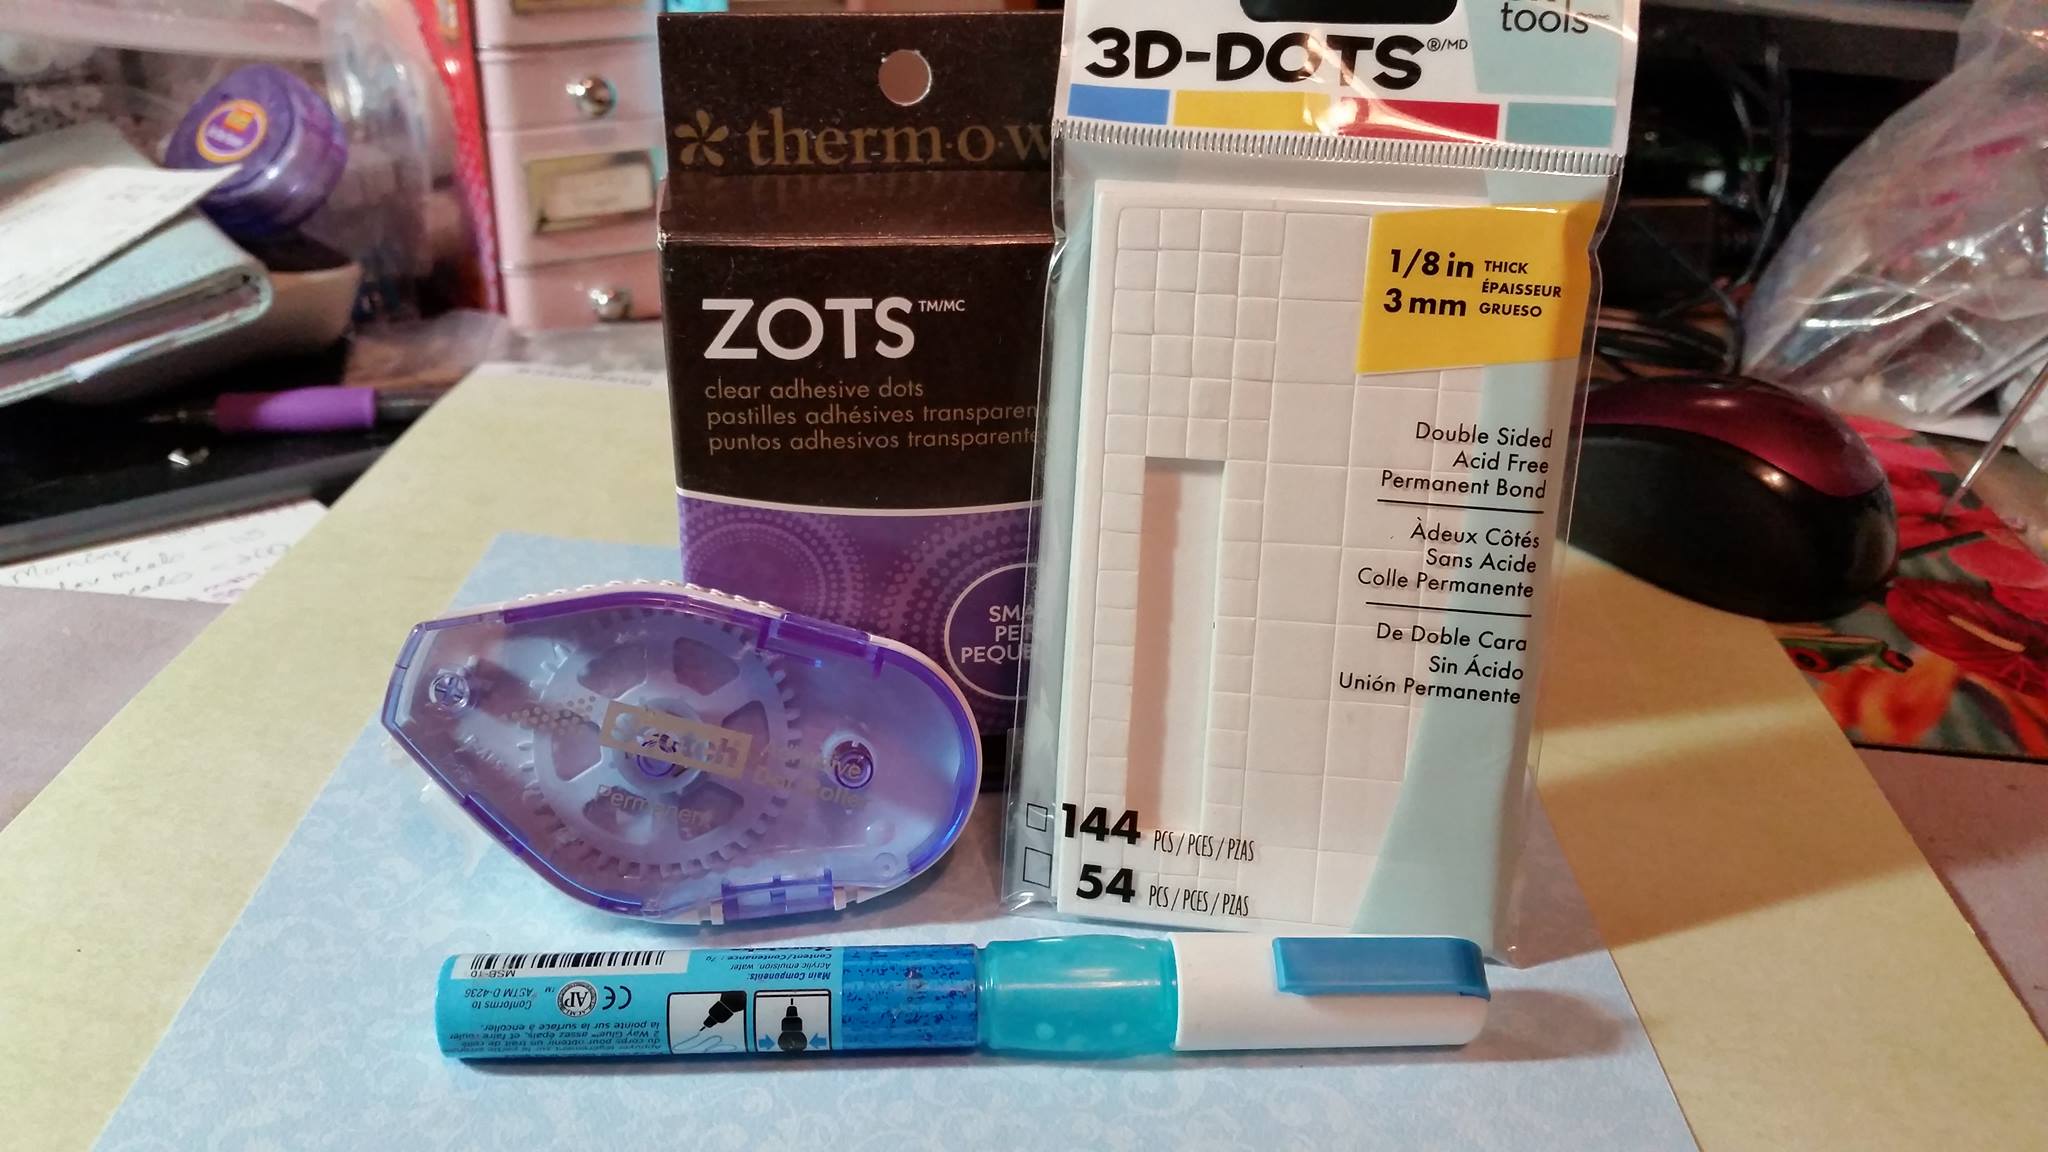
Here’s a group of some of my favorites:

Adhesive Assortment
These are probably the adhesives I use the most – a Scotch dot roller, a Zig Glue pen, pop dots, and glue dots. The other adhesives I also use ,but which are not pictured here, are Scor-tape (a strong double sided tape that can be torn into the proper size) and Scotch Quick-Dry adhesive. So how do you know when to use what? It really depends on the object you are trying to adhere (the weight of the object as well as the porosity) along with the surface you are gluing too. I thought it might be fun to go through the construction of a scrapbook layout to see exactly when I choose which adhesive.
Right now I’m working on a bunch of baby albums – seems like all my friends have babies or grandbabies on the way! I love giving small handmade brag books as gifts – they’re personal, unique, and recipients always love them. I always include a “Coming Home” page for when the family comes home from the hospital – one of the first big events in baby’s life! This is the page I decided on:

Coming Home Layout
First I need to create the background; for this page, I’m adhering the green wavy “grass” to the blue sky… that’s basic paper to paper on a fairly large scale, so I’ll my Scotch adhesive dot roller:


Dot roller on grass
Dot rollers use a series of dry, tacky “dots” which are transferred from the roller onto the paper as you literally “roll” the tool across the paper. The advantages to dot rollers is that the adhesive is easy to apply, it is immediately tacky, and if you set your item down lightly it can be moved without too much trouble if you make a mistake. If you make lots of mistakes, or like to lay things out and move them out, there is a repositionable cartridge refill; I’ve never used them, but the option is available. Because dot roller adhesive is dry, the surface of the paper doesn’t buckle or smear. They are moderately priced; there are cheaper options and more expensive options out there, so they fall pretty much in the middle, but I think the ease of use trumps slightly cheaper options; and, they work really well, so no need to move to more expensive options. When they first came out they were very difficult to refill and involved a Masters Degree in engineering, but the Scotch brand is super easy – open the case, pop out the used cartridge and replace with a new refill cartridge.
Now I want to make my house – it involves a lot of tiny die cut pieces:

Elizabeth Crafts deconstructed house die cut
Yikes, right? How am I going to adhere all those tiny pieces? My dot roller is out… the pieces will either tear or just roll up into the tool. This is where I like to use my Zig glue pen… the glue can be used two ways. When it comes out of the pen it’s blue… if you adhere your item right then, the bond is permanent. If, on the other hand, you allow it to dry until it is clear, it is repositionable. To create my house I wanted permanent bonds, so I used it while still blue and wet:

Zig glue pen on window frames

Assembled window

Zig glue on house eaves

House assembled
Now that the house is assembled, it’s cute, but maybe needs a little something extra. I decided I wanted to add a little button heart on the door. Buttons are smooth and a little heavier than paper, so we need to think of another adhesive option. The Scotch quick dry glue would work, but would need a little time to set. Glue dots are a great option because they’re fairly cheap, easy to apply, and have a very strong bond. They come on sheets:

Glue dots on backing paper
And you just apply them right to your embellishment:

Press embellishment into glue dot
And then stick it on your layout:

Embellished house
Instant, strong bond! Now my little house is complete AND looks super cute. Since the house is paper and the overall weight isn’t that much, I used my dot roller to adhere it to the layout. Next I wanted to create the photo mat. For this particular layout, I used an old scrap I had that was flocked:

Flocked paper
See the little blue dots that are fuzzy? Sometimes when papers have additional material, like flocking, glitter, or embossing, manufacturers will use a slightly thicker paper base, or coat the paper in chemicals that make them curl slightly. My flocked paper was thicker and looked a little curled, so instead of my dot roller I opted to use my Scor-Tape. Scor-tape is double sided adhesive on a roll; it’s created so you can just tear off the amount you need, but the bond it creates is very strong. I applied the Scor-Tape to the back of the photo mat.

Scor-tape on flocked paper
But wait – I decided I wanted to dress up my photo mat a little since my friend’s grandchild is a girl and my friend is the definition of a girly-girl, so I decided to add some ribbon and a bow. Ribbon is deceptive – a lot of people want to use liquid glue. I don’t like to use liquid glue on ribbon as I find it often bleeds through and creates a hard, shiny line on my ribbon. For ribbon, I use my dot roller:

Dot roller on ribbon
You can adhere it only on the ends and wrap them around the photo mat, so you can still slide the photo underneath the ribbon on the front. I made a little bow from the same ribbon, but I couldn’t use my dot roller on the bumpy bow, so I used another glue dot:

Picking up a glue dot with a bow

Glue dot on the back of the bow

Ribbon and bow attached
Here you can see the layout with the house and the photo mat, with the ribbon and bow. Note that the ribbon is only attached to the back of the photo mat; that way the photo can be adhered beneath it. The trees are in the picture too; how did I adhere those? I used my Zig glue pen on the small, thin trunk pieces and my dot roller on the rounded foliage parts:

Dot roller on tree back
I decided I wanted the tree on the left to stand out a little, so I adhered it to the layout with pop dots:

Pop dots on tree back
Pop dots are essentially squares of foam that have adhesive on two sides. You peel the pop dot off it’s backing sheet and adhere it to the item you want to pop up; then you need to peel the backing off the top of the pop dots, and then you can turn it over and adhere it to your layout.

View of bow and popped up tree
We’re almost done. Now we just need a title. Can you guess which adhesive I’m going to use for skinny paper letters?

Zig glue pen on title
Yup, back to my trusty Zig glue pen. I really do love these pens. Here’s another look at the completed layout:
Coming Home Layout
Deceptively simple – non-scrappers would never guess that we used five adhesives for one project! If you take classes, I highly recommend you keep a separate stash of adhesives in your class toolkit – you just never know what you’re going to need!
How Do I... Adhesive Schmadhesive...
No comments:
Post a Comment